With Google ad campaigns, there’s lots of money at stake, so you need to be sure you’re spending it wisely. While Google Ads does much of the work of managing ad campaigns for you, it doesn’t give you a comprehensive set of tools to track ad campaigns effectively. One thing you get with Google Ads is a little-known component called GCLID, or Google Click Identifier, a tool that can help you learn more about how users are moving around a website.
What is GCLID and what are the essential things you should know about it?
What Is the Google Click Identifier or GCLID?
Google Click Identifier or GCLID is a tool that can help you learn more about how users are moving around a website.
To be more precise, according to Google:
Google Click ID (GCLID) is a parameter passed in the URL with ad clicks, to identify the campaign and other attributes of the click associated with the ad for ad tracking and campaign attribution.
When setting up your Google Ads, if you turn on the auto-tagging setting, GCLID will be automatically activated, as it’s required for conversion tracking and used to link the data between Google Analytics and Google Ads.
GCLID has its good points, but it’s worth mentioning that it has a few issues too. The important thing is to understand how it works so you can look at your data set as a whole and make the best decisions about managing websites.
Benefits of GCLID
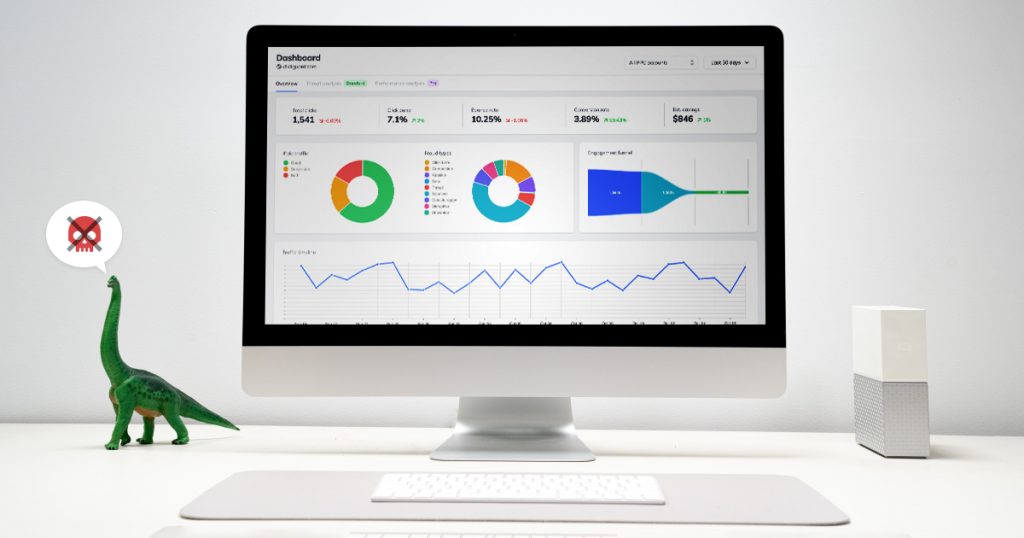
GCLID automatically tags users that click on ads and tracks them as they navigate the rest of the site. Ads auto-tagging gives you data that shows how much time users spend on your site and how many pages they visit after they click on an ad.
If there’s anything marketers love, it’s data. No, really, we data more than cake loves frosting! Fortunately, there are lots of data flying around every Google Ads campaign. The key to running effective campaigns is learning how to capture and tap into the data you need so you know what’s working and what’s not. Sorry, there ain’t no magic formula here — just numbers, user behavior, and a fair share of trial and error.
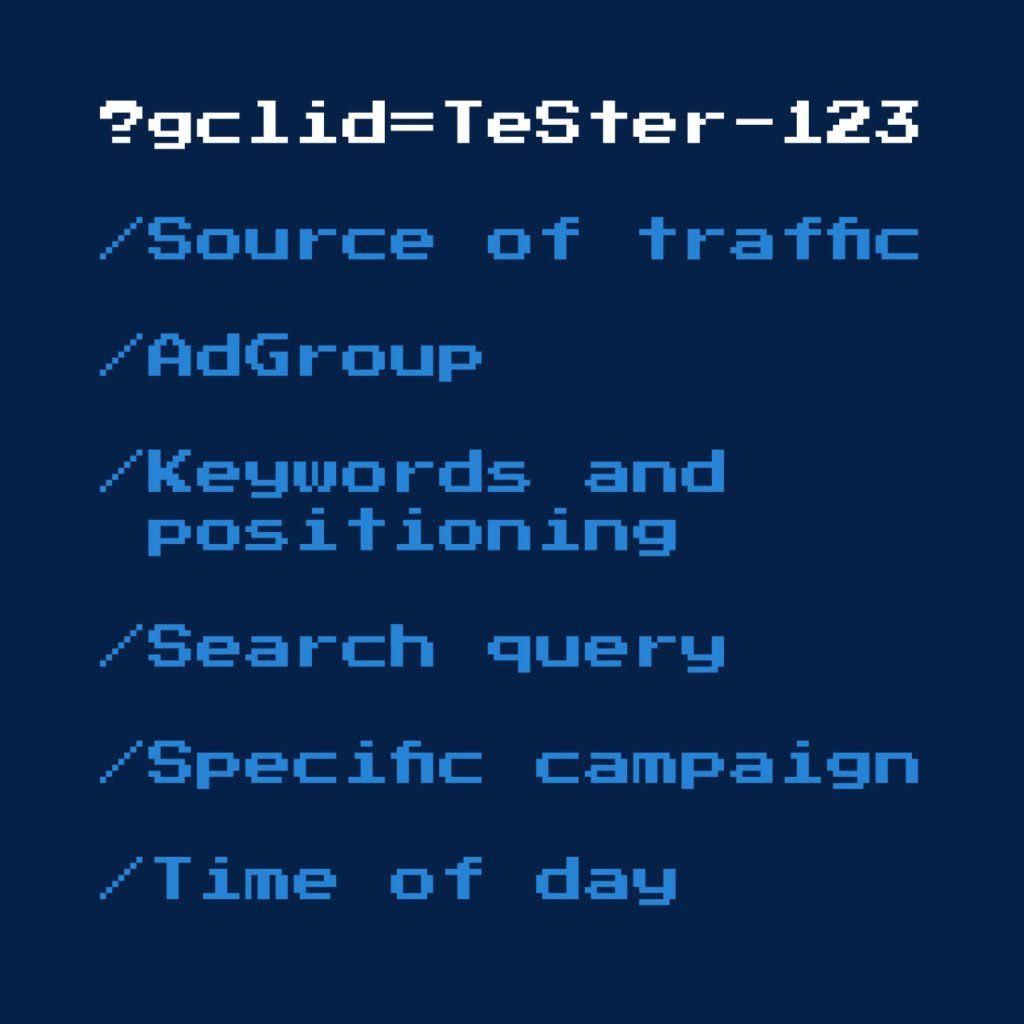
Google adds the GCLID by default. You may recognize it as a long slice of code that follows a URL. What this little identifier does is give you useful data on metrics like:
What’s really great about GCLID is that it tracks all this information automatically without any effort on your part at all. And if there’s anything marketers love more than data is saving time so they can find and evaluate even more data. Fact.
In addition to saving time, GCLID gives you greater insight into how you’re spending your ad campaign dollars, so you can tell if you’re spending them as effectively as possible.
Google GCLID is just one way to get data that helps you evaluate (and boost) your ROAS. More importantly, this data supplements your other bits of data to help you evaluate the overall success of your ad campaigns.
Just in case you thought Google was genius in coming up with GCLID, Facebook and Microsoft have their own versions of click identifiers. Facebook’s click identifier is known as FBCLID and Microsoft’s is commonly known as MSCLID.
Downsides of GCLID
The data you glean from your analytics has to be accurate to be of any value to you. In a perfect world, every user that visits a website would know exactly how to navigate it, and every visit would result in a conversion. Obviously, that’s just not a realistic expectation. Weep.
The reality is that people will land on websites they have no interest in, click multiple times on the same link, and do all sorts of things that don’t make sense for the other end of this deal: marketers. Plus, there’s always the issue of click fraud. Fortunately, Ads’ auto-tagging helps you track user performance, so you’ll have a better idea on whether the data you’re getting is actually accurate or, well, messy.
The biggest challenge in digital marketing is getting your target audience to a particular website and convincing them to buy. To make that happen, you have to learn more about what guides users to a website, and what influences their behavior once they get there. Easier said than done, but still not impossible.
Why Is GCLID Important?
A question that’s probably weighing on your mind is how important is GCLID? Is it something that’s worthwhile to delve into further?
The answer is less straightforward than we’d love: it might be. Let’s dig into why is GCLID actually important.
For the vast majority of marketers, s GCLID provides you with sufficient data. However, If you’re a real data-driven marketer, no amount of data will ever be enough. Sigh.
Here’s a snapshot of what website managers like about the Google Click Identifier
- You can use it to set up goals in Google Analytics.
- You can link Google Analytics with Ads to see which ads are gaining traction.
- Eliminates the need to manually set up tags for every URL.
- You have the option of using alternative tracking providers.
To the final bullet point, you might be wondering why you might want to use alternate tracking providers. The reason is pretty simple. Various external providers make it possible to add even more tracking parameters to your Urchin Tracking Module (UTM).
The Urchin Module is made up of tags that you can add to the end of a link to track and analyze a webpage’s traffic sources. Ultimately, by using an external provider and setting up the right GCLID parameters, you can automatically track the metrics that give you the most useful data. As users click on various links, the activity gets registered in Google Analytics. You’ll be able to see the data in the different Analytics dashboards.
More data. More specific data. It’s just what you were after! Admit it, your heart beats a little faster just reading this!
To flip the switch a bit, the downside to not tracking the success of ad campaigns means that you have no way to know exactly what you’re spending your advertising budget on. That’s pretty much the PPC equivalent of tossing a bag of money in the air and waiting for the wind to hopefully blow it in the right direction (instead of using wire transfer like everyone else does, d’oh)
Undoubtedly, GCLID can help you determine the following:
- Which keywords are getting clicks
- Which search terms are effective
- What time of day is most successful
- How many clicks result in conversions
Up to this juncture, it’s pretty easy to see why the Google Click Identifier auto-tagging might appear to be a goldmine. Of course, while the GCLID has some niceties, it’s not without its faults (like pretty much everything under the Sun, right?).. Read on to learn about the things that aren’t so great about the GCLID.
Problems that May Occur with GCLID
While the GCLID works great most of the time, things can and unfortunately do go wrong. And when they do, it can leave you scratching your head. When GCLID isn’t performing as you expect it to and isn’t giving you the results you’re looking for, it’s time to get back to the drawing board.
You can begin with one of the 4 most common problems with GCLID:
1. Clicks don’t match up with sessions
2. The tracking code doesn’t work with the website
3. The tracking code doesn’t work with the campaign
4. The redirects are causing problems with auto-tagging
Fortunately, there are some pretty easy ways to fix these common GCLID issues.
- Make sure the tracking code is installed correctly
- Make sure the code on your landing page is installed correctly
- If you’re using manual tagging, be sure to check details like capitalization and formatting of UTM parameters
- Check to see that your Google Ads and Analytics accounts are linked
In addition to this, it might also help to add the mobile website version to your Google Ads. Why? Because the redirect from a desktop website to a mobile website can confuse the tracking script.
Finally, you might also be getting an error code if your website isn’t compatible with the auto-tagging feature.
And if all else fails, Google offers troubleshooting help with GCLID, Google Ads, and Google Analytics. Another handy resource for tackling problems with the GCLID is Google Tag Assistant, which is an extension for Chrome.
Can GCLID Help With Detecting Click Fraud?
Perhaps one of the most notable benefits of the GCLID is that it can help you identify fraudulent clicks on your Google Ads PPC campaigns. Click fraud can quickly destroy your ad campaign budget.
Because GCLID tracks clicks, you’ll be able to see whether you’re getting repeated clicks from the same location or the same source. If you are experiencing an unusually high bounce rate, this too could be a sign of click fraud.
To stay on top of click fraud, you need to check the performance of your PPC campaigns every day.
The warning signs of click fraud and ad fraud are pretty clear:
- Clickthrough rates better over 1% or that are higher than average
- High bounce rates
- Suspicious IP addresses
- Clicks generated from unfamiliar websites that have extraordinarily high traffic
Google’s native tools will give you a heads up when you need to check your traffic and activity if you’re not checking it every day. Remember, Google Analytics shows you where clicks are coming from. A little due diligence on your part will help you to catch click fraud before it gets out of control (and as such, take steps to prevent it)
Summary
In conclusion, the Google Click Identifier gives you a lot of good information to support high-quality Google Ads campaigns. In addition, Google offers a small amount of protection from click fraud and ad fraud, but if you’re like most PPC marketers it’s simply not enough. If you’re doing your best, and your ROAS still isn’t where you want it to be, why not check into the benefits of a click fraud protection program?